Blog
elFinder integration
Hey guys!
Today I lost almost a half a day trying to integrate a standalone version of the elFinder, so I though of writing a little little “know how”.
For those of you who don’t have a clue, what elFinder is a really neat Web File Manager, with easy customization and lots of features.
So lets get straight to the point. I spend a lot of hours trying to find a simple example or documentation, but i didn’t find any for the latest version, and for some reason I couldn’t understand the examples i found, because the main point was missing – which file you should you edit, than I found this helpful article and it struck me as a lightning from nowhere – It was easy as hell!. The main problem was i was editing the wrong file and trying to combine 2 files into one.
So lest get started.
The first thing we should do is create our page where the elFinder would be opened.
<!DOCTYPE html>
<html xmlns="http://www.w3.org/1999/xhtml" dir="ltr" lang="en-US"><head profile="http://gmpg.org/xfn/11">
        <head>
            <meta http-equiv="Content-Type" content="text/html; charset=utf-8" />
            <script src="http://ajax.googleapis.com/ajax/libs/jquery/1.9.1/jquery.min.js"></script>
            <!-- we will use this simple popup plugin that can be downloaded from -> http://swip.codylindley.com/popupWindowDemo.html -->
            <script src="js/jquery.popupWindow.js"></script>
            <title>Standalone integration of elFinder</title>
            <link href='http://fonts.googleapis.com/css?family=Tauri' rel='stylesheet' type='text/css'>
                <style type="text/css">
                    * {
                        margin: 0px;
                        padding: 0px;
                    }

                    body {
                        background : #ececec;
                        font-family: 'Tauri', sans-serif;
                    }
                    #main {
                        width: 900px;
                        margin: auto;
                    }

                    h1 {
                        font-size: 36px;
                        color: #333;
                        text-shadow: 2px 2px 0px #fff;
                        text-transform: uppercase;
                        text-align: center;
                    }

                    h2 {
                        font-size: 18px;
                        color: #333;
                        float: right;
                        margin-bottom: 30px;
                    }

                    .clear {
                        clear: both;
                    }

                    a {
                        color: cornflowerblue;
                        text-decoration: none;
                        text-shadow: 2px 2px 0px #fff;
                    }

                    h2 span {
                        color: #4d4d4d;
                        font-style: italic;
                        text-shadow: 2px 2px 0px #fff;
                    }

                    .button-group {
                        width: 400px;
                    }

                    input[type="text"] {
                        padding: 10px;
                        width: 300px;
                        background: #666;
                        border: 1px solid #333;
                        box-shadow: inset 1px 1px 1px 0px #4F4F4F, inset -1px -1px 1px 0px #4F4F4F;
                        color: #fff;
                        font-family: 'Tauri', sans-serif;
                        text-shadow: 0px 1px 1px rgba(0,0,0,0.75);
                        float: left;
                    }
                    button.browse {
                        float: right;
                        width: 78px;
                        background: #32b50e; /* Old browsers */
                        /* IE9 SVG, needs conditional override of 'filter' to 'none' */
                        background: url(data:image/svg+xml;base64,PD94bWwgdmVyc2lvbj0iMS4wIiA/Pgo8c3ZnIHhtbG5zPSJodHRwOi8vd3d3LnczLm9yZy8yMDAwL3N2ZyIgd2lkdGg9IjEwMCUiIGhlaWdodD0iMTAwJSIgdmlld0JveD0iMCAwIDEgMSIgcHJlc2VydmVBc3BlY3RSYXRpbz0ibm9uZSI+CiAgPGxpbmVhckdyYWRpZW50IGlkPSJncmFkLXVjZ2ctZ2VuZXJhdGVkIiBncmFkaWVudFVuaXRzPSJ1c2VyU3BhY2VPblVzZSIgeDE9IjAlIiB5MT0iMCUiIHgyPSIwJSIgeTI9IjEwMCUiPgogICAgPHN0b3Agb2Zmc2V0PSIwJSIgc3RvcC1jb2xvcj0iIzMyYjUwZSIgc3RvcC1vcGFjaXR5PSIxIi8+CiAgICA8c3RvcCBvZmZzZXQ9IjEwMCUiIHN0b3AtY29sb3I9IiMwYzdmMGEiIHN0b3Atb3BhY2l0eT0iMSIvPgogIDwvbGluZWFyR3JhZGllbnQ+CiAgPHJlY3QgeD0iMCIgeT0iMCIgd2lkdGg9IjEiIGhlaWdodD0iMSIgZmlsbD0idXJsKCNncmFkLXVjZ2ctZ2VuZXJhdGVkKSIgLz4KPC9zdmc+);
                        background: -moz-linear-gradient(top,  #32b50e 0%, #0c7f0a 100%); /* FF3.6+ */
                        background: -webkit-gradient(linear, left top, left bottom, color-stop(0%,#32b50e), color-stop(100%,#0c7f0a)); /* Chrome,Safari4+ */
                        background: -webkit-linear-gradient(top,  #32b50e 0%,#0c7f0a 100%); /* Chrome10+,Safari5.1+ */
                        background: -o-linear-gradient(top,  #32b50e 0%,#0c7f0a 100%); /* Opera 11.10+ */
                        background: -ms-linear-gradient(top,  #32b50e 0%,#0c7f0a 100%); /* IE10+ */
                        background: linear-gradient(to bottom,  #32b50e 0%,#0c7f0a 100%); /* W3C */
                        filter: progid:DXImageTransform.Microsoft.gradient( startColorstr='#32b50e', endColorstr='#0c7f0a',GradientType=0 ); /* IE6-8 */
                        border: none;
                        padding: 9px;
                        border: 1px solid #146307;
                        border-left: 0px;
                        border-top-right-radius: 5px;
                        border-bottom-right-radius: 5px;
                        color: #fff;
                        font-family: 'Tauri', sans-serif;
                        box-shadow: inset 1px 1px 1px 0px #36C10F, inset -1px -1px 1px 0px #36C10F;
                        text-shadow: 0px 1px 1px rgba(0,0,0,0.75);
                        cursor: pointer;
                    }

                    #picture {
                        border-radius: 5px;
                        border: 5px solid #fff;
                        width: 390px;
                        height: 390px;
                        margin-bottom: 10px;
                        vertical-align: middle;
                    }

                    #picture img{
                        width: 390px;
                        height: 390px;
                    }

                    #picture span {
                        display: block;
                        padding: 10px;
                        color: #A6A6A6;
                        font-size: 24px;
                        text-align: center;
                        font-family: 'Tauri', sans-serif;
                        text-shadow: 2px 2px 0px #fff;
                        margin-top: 150px;
                    }
                </style>
        </head>
        <body>
            <div id="main">
                <h1>Standalone integration of elFinder</h1>
                <h2>by <span>Martin Andreev - <a href="http://www-you.com">WWW-YOU</a></span></h2>
                <div class="clear"></div>
                <div id="picture">
                    <span>No picture?Use the browse button to select one!</span>
                </div>
                <div class="button-group">
                    <input type="text" id="featured_image" placeholder="Profile Image Url" readonly name="featured_image" />
                    <button type="button" class="browse" id="imageUpload" > Browse </button>
                </div>
                <script type="text/javascript">
                    $(document).ready(function(){
                        $('#imageUpload').popupWindow({
                            windowURL:'elfinder/elfinder.html',
                            windowName:'Filebrowser',
                            height:490,
                            width:950,
                            centerScreen:1
                        });
                    });

                    function processFile(file){
                        $('#picture').html('<img src="' + file + '" />');
                        $('#featured_image').val(file);
                    }
                </script>
            </div>
        </body>
</html>
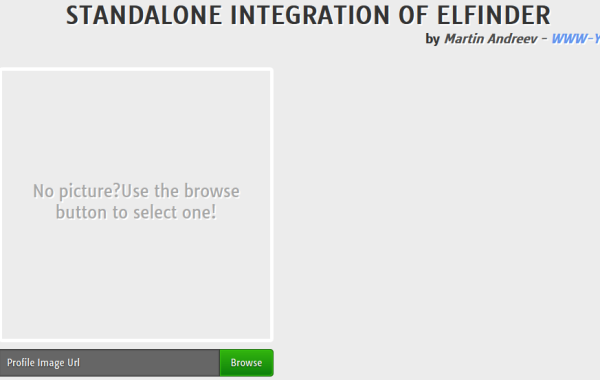
So now we have our test page
Ok so here we create out the page where we will show the elfinder. Notice that we have a function called processFile. We will talk about it latter.
Now lets open the elfider.html file that is located in your elfinder directory. Just copy and paste it in your file. *** NOTICE *** When i was creating this tutorial i used a clean installation. If you want to use it with a rich text editor for example you must create a new elfinder.html and paste the html there.
<!DOCTYPE html>
<html>
    <head>
        <meta http-equiv="Content-Type" content="text/html; charset=utf-8">
        <title>elFinder 2.0</title>

        <!-- jQuery and jQuery UI (REQUIRED) -->
        <link rel="stylesheet" type="text/css" media="screen" href="http://ajax.googleapis.com/ajax/libs/jqueryui/1.8.18/themes/smoothness/jquery-ui.css">
        <script type="text/javascript" src="http://ajax.googleapis.com/ajax/libs/jquery/1.7.2/jquery.min.js"></script>
        <script type="text/javascript" src="http://ajax.googleapis.com/ajax/libs/jqueryui/1.8.18/jquery-ui.min.js"></script>

        <!-- elFinder CSS (REQUIRED) -->
        <link rel="stylesheet" type="text/css" media="screen" href="css/elfinder.min.css">
        <link rel="stylesheet" type="text/css" media="screen" href="css/theme.css">

        <!-- elFinder JS (REQUIRED) -->
        <script type="text/javascript" src="js/elfinder.min.js"></script>

        <!-- elFinder translation (OPTIONAL) -->
        <script type="text/javascript" src="js/i18n/elfinder.ru.js"></script>

        <!-- elFinder initialization (REQUIRED) -->
        <script type="text/javascript" charset="utf-8">
            $().ready(function() {
                var elf = $('#elfinder').elfinder({
                    url : 'php/connector.php',  // connector URL (REQUIRED)
                    getFileCallback : function(file) {
                        window.opener.processFile(file);
                        window.close();
                    },
                    resizable: false
                }).elfinder('instance');
            });
        </script>
    </head>
    <body>

        <!-- Element where elFinder will be created (REQUIRED) -->
        <div id="elfinder"></div>

    </body>
</html>
Now about that function processFile. As you can see after we select the file, the processFile function is fired. This was we can have abstration and use this script more than for one thing. If we have a new feature, we only have to change the processFile function in the file where we use elFinder.
If you have any questions be sure to leave them in the comments below. Special thanks to Csanad Novak (http://forrst.com) for saving me some time trying to figure it out by myself. You can download the zip file from the example here.
All the best
The WWW-YOU team.


thanks ..
After hours and hours trying craps …. THANK YOUUUUUHOOOOOHOOOHO !!!
Maybe you know how to deal with a modal window ? That would be the best standalone integration ever !!
Hey. Well you can :) use colorbox open via iframe and when you call the select function like in the tutorial and do : parent.$.fn.colorbox.close(); hope it helps :)
When i wrote the tutorial i used normal popup, because it did the trick :)
Thank you, Good Job.
Glad I could help :)
really good solution, thank you for publishing
Do you have whole code ( demo ) for download ?
Yes, click on the “zip file from the example here.” link :)
Thnx everything id OK, but I get this message in popup “Unable to connect to backend.
Backend not found.”
returns [object Object]